

The technique for planting summer season squashes, wintry weather squashes, and pumpkins is the same. Expand all squashes on hills spaced 3 to 8 feet apart depending upon the leaf size–the larger the leaf the farther apart. Set seedlings started indoors inside the garden as soon as the weather has warmed. Make sure that squashes are huge and robust forward of the top of June when squash beetles hit the garden. The larger and stronger the plant the better it’s going to resist attack.
Plant summer season squashes, wintry weather squashes, and pumpkins all at the an identical time and the harvests will likely be staggered from midsummer to the principle frost–summer season squash in about 50 days, wintry weather squash in about 85 to 100 days, and pumpkins after 100 or additional days.
Summer time and wintry weather squashes and pumpkins
Squashes and pumpkins are members of the gourd family. Summer time squashes and pumpkins originated in Mexico and Central The U.S.. Most wintry weather squashes originated in or with reference to the Andes in northern Argentina.
Summer time squashes–zucchini, patty pans, and cocozelles (Italian for vegetable marrows)–have whitish or yellow flesh. They are the quickest to harvest–picked in summer season while immature and as briefly they are big enough to use.
Wintry climate squashes have orange flesh. They take longer to mature than summer season squashes. Harvest wintry weather squashes when their skins are extremely difficult and their stems have started to dry out.
Pumpkins–which can be simply very huge hard-skinned squashes which will also be normally orange–are the longest to harvest maximum regularly on account of they are again and again carved at Halloween and pureed for Thanksgiving pie. Like other wintry weather squashes, they are picked when their skins are extremely difficult and their stems are dry.
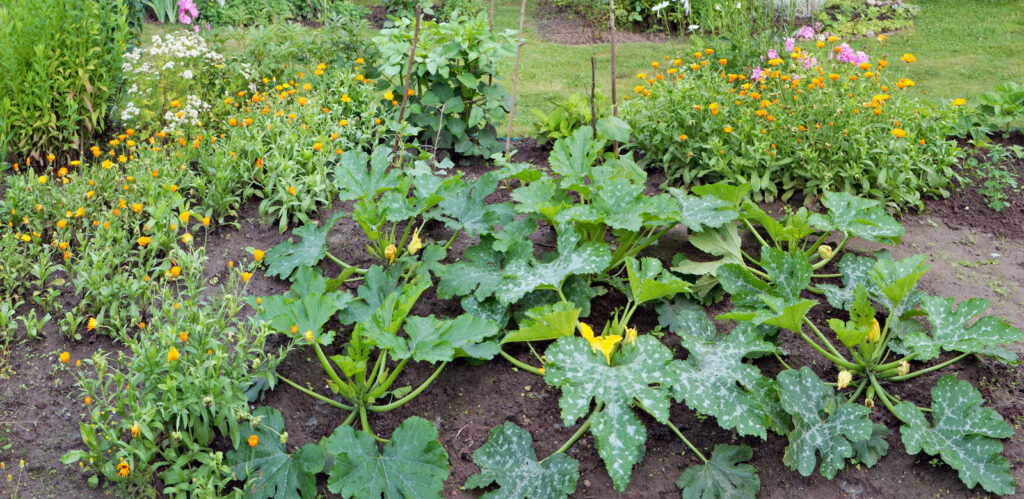
Planting squash
Plant squashes and pumpkins when evening time temperatures no longer fall underneath 55°F and the soil is at least 60°F (seeds may not germinate in cold soil–the optimal soil temperature is 70°F). Get in a position the planting internet web page by way of digging a hole 18 inches wide and deep. Place 3 to 4 inches of aged compost or manure into the bottom of the hole and fill up the hole with 3 parts soil and 1 segment compost or manure. Create a planting hill about 4 inches best. Area the hills about 3 to 4 feet apart for bush squash and 8 feet or additional apart for vining plants. Set 6 to 8 seeds frivolously spaced on each mound. They will germinate in 7 to 14 days depending upon the variety. When plants are 3 inches tall thin to the two maximum robust seedlings (use scissors to thin fairly than pulling plants up by way of the roots which can upend neighboring plants). Use cloches to offer protection to cold-sensitive seedlings if frost threatens.
Protecting squash from cold
Floating row covers will protect squashes from dipping temperatures. If evening time temperatures fall underneath 65°F put the row covers in place. Row covers may additionally protect plants from early pests. When plants begin to flower (about 3 weeks after they have got sprouted), remove the row covers to allow for pollination by way of bees and insects.
Watering squash
Water seedlings smartly, and keep the soil rainy in every single place the season; the roots need commonplace moisture. If plants look wilted forward of eleven o’clock inside the morning, they would like water. (Dig down inside the soil; if the soil is dry at 4 inches down–water. If the soil is rainy at 3 inches down, watering is very good.) To avoid transmitting illnesses, water at the base of each plant and keep the foliage dry. Leaf and fruit illnesses are merely transmitted by the use of wet foliage. Avoid coping with plants when they are wet. It isn’t peculiar for squash to wilt relatively on scorching days.
Feeding squash
Squashes are heavy feeders. Add a lot of aged compost or manure to the planting bed in advance of sowing. Forward of you plant, place aged compost or manure at the bottom of each planting hole and throw in a buffer inch or two of native soil. This will likely most probably get plants off to a formidable get began. Observe compost tea or manure tea at transplanting or two weeks after seedlings emerge. Feed over again with compost tea in 3 weeks or when the principle plants appear. When the principle end result set, water each plant with compost tea or side-dress each plant with a shovel full of compost. If leaves are gentle, give plants a dose of fish emulsion. On the other hand be careful not to give squashes quite a lot of nitrogen; nitrogen will increase leafy growth on the other hand decrease fruit yield.
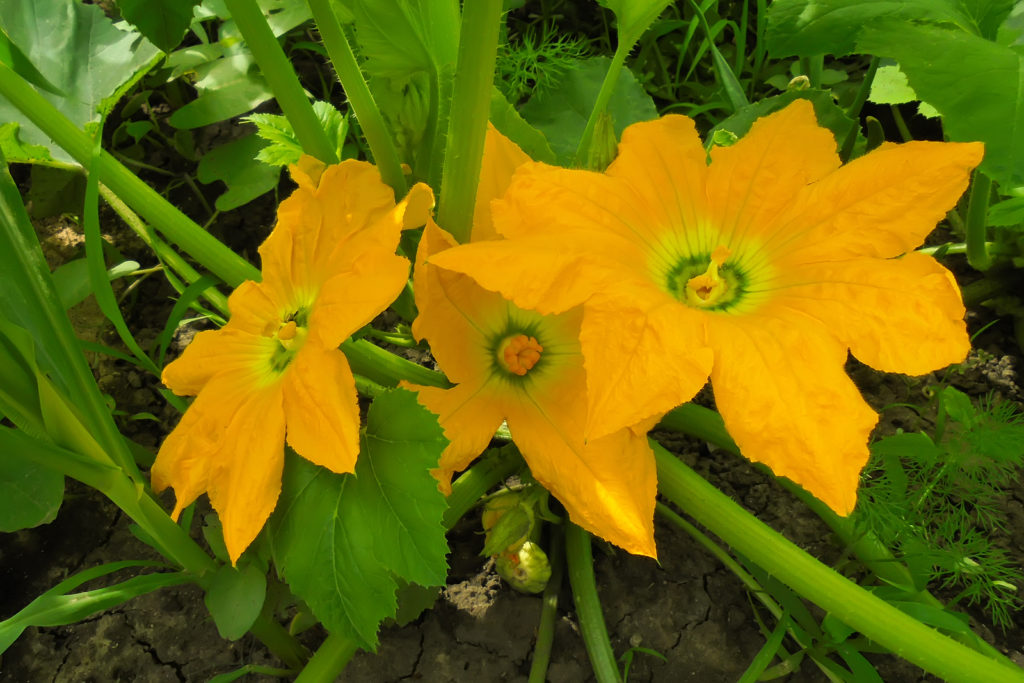
Squash pollination
Squash plants merely cross-pollinate. In the event you occur to broaden a few type of squash for your garden, hand-pollination may be some of the most simple tactics to forestall cross-breeding. You are able to transfer pollen from the male stamen to the female pistil the use of a small brush or make a selection off the male flower and run the stamen towards the female flower. Female plants incessantly blossom forward of male plants appear. (Female plants have a tiny fruit at their base.) If female plants don’t seem to be pollinated, they’re going to dry up and fall off. Because of squash plants are prolific bloomers, briefly male plants will appear to pollinate later female blossoms. As smartly, squash plants will once in a while abort small end result when there is a heavy fruit set. This can be a self-pruning process.
Pruning squash
When vines broaden to 5 feet, pinch off the emerging tips to encourage fruit-bearing side-shoots. By the use of midsummer, pinch off final plants and small end result on vining and wintry weather squash. This will likely most probably allow the plant to point of interest its energy on the ripening crop.
Mulching squash
To avoid rot, put 6 inches of straw, hay, or dry leaves beneath fruit. Mulch when vines begin to lengthen. This will likely most probably gradual weed growth. Weeds compete with plants for water and nutrients. If the mulch gets wet, set a board or shingle beneath each fruit. Early inside the season, black plastic can be used to mulch squashes. Black plastic helps warmth the soil earlier and keeps it warmth; this, in turn, can boost up the growth of squashes.
Harvesting squash
Harvest squashes when the weather is dry. Use a sharp knife to cut the fruit off the vine, leaving 3 to 4 inches of stem on the fruit. Harvest summer season squash when the fruit is small to moderate size. Pick each fruit forward of the blossoms drop off the highest otherwise, the plant will surrender producing. Pick wintry weather squash and pumpkins when the rind is thick and difficult and can’t be penetrated by way of a thumbnail. Pick wintry weather squashes and pumpkins forward of the principle frost. Dry wintry weather squashes (except for acorn squash) inside the sun until stems shrivel and turn gray; this will every now and then take a few week. Store wintry weather squash in a cool, dry place with temperatures of 45° to 50°F and with 65 to 70 % humidity.
Additional squash emerging guidelines at Learn to Expand Squash.
Additional pumpkin broaden guidelines at Learn to Expand Pumpkins.


