

Plastic tunnels can be used to extend the vegetable emerging season by way of 4 to 8 weeks. A plastic tunnel is indubitably made by way of draping plastic sheeting over a sequence of robust twine or plastic hoops to create an enclosed emerging house.
A plastic tunnel works identical to a cold frame. The temperature inside a clear or opaque plastic tunnel can be heated by way of the sun 5, 10, or even 20 ranges F (2.8-12 ranges C) warmer than the out of doors temperature right through the day. The residual solar heat inside a plastic tunnel can keep vegetation 2 to 7 ranges (1.1-3.9 ranges C) warmer than the out of doors temperature at night time.
A plastic tunnel can be moveable–as small as 3 to 6 feet (.9-1.8m) long, 3 feet large, and a couple of feet tall, merely large enough to expand salad greens–or near to permanent, 25 feet (7.6m) long or additional and tall enough to walk in. A large walk-in plastic tunnel for emerging tall crops comparable to Brussels sprouts or tomatoes is called a hoop area.
Space Garden Tunnels
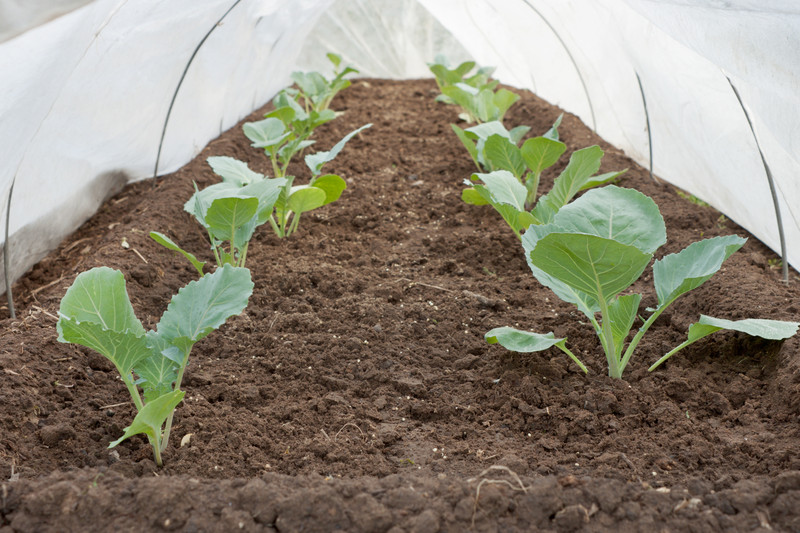
The average area garden plastic tunnel can be used to expand cool-weather crops from autumn into wintry climate and from wintry climate into spring. An 18 to 24 inch (45-60cm) tall plastic tunnel will accommodate lettuce, spinach, and other salad greens. A 24 to 36 inch (60-91cm) tall plastic tunnel can be used to expand broccoli, Brussels sprouts, and cabbage.
Make a Plastic Tunnel
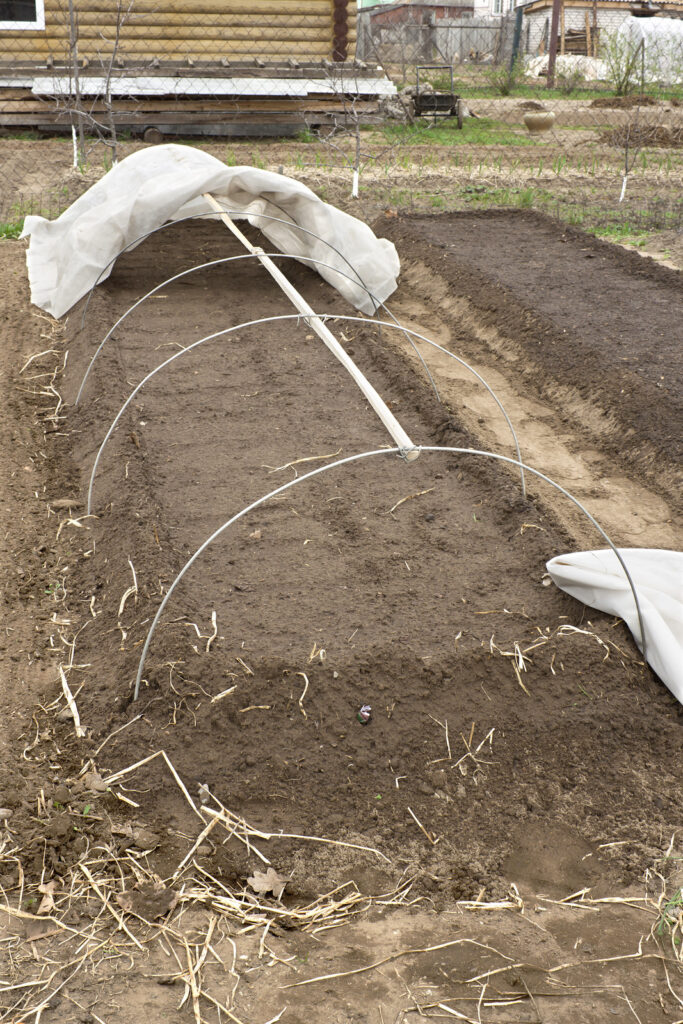
Hoops for a small plastic tunnel can be produced from powerful #8 or #9 gauge twine or 5/8-inch diameter plastic tubing. The twine or tubing is arched over the emerging bed and lined with 2 to 6 mil polyethylene or copolymer sheeting to form an enclosed tunnel. (Plastic sheeting is readily available at {{hardware}} or area expansion stores; 1 mil equals 1/1000 of an inch. Sheeting with an ultraviolet mild inhibitor may be very best possible.) Space the hoops each and every 2 to 2½ feet (60-76cm) apart and arch them across the bed, 3 to a few ½ feet (91-106cm) large. To make a taller tunnel set the 5/8-inch plastic hoops into rigid 1-inch diameter PVC pipe driven into the ground.
The arched hoops can be secured to a foundation or wooden raised bed frame with brackets or thrust 6 to 12 inches (15-30cm) or additional into the ground. Take hold of the plastic sheeting to the arches with spring-loaded clamps similar to clothespins. The sheeting around the bottom edges and closed ends of the tunnel can be held in place with soil, wooden planks, bricks, or stones. It will be important that the sheeting not be totally secured; plastic tunnels require venting right through the day when the outside temperature rises to 60°F (15.6°C) or higher and the internal temperature reaches 80°F (26°C) or additional. (Plastic tunnels require the equivalent venting as cold frames to ensure vegetation do not transform overheated.)
Ventilating the Plastic Tunnel
Fresh air will have to be allowed to enter the plastic tunnel. And when temperatures are warmth, it’s crucial to let heat escape. To allow for venting, the clamps that grasp the plastic in place can be removed to drag once more the plastic along the sides or the tunnel ends can be left open. Alternatively, slitted plastic sheeting can be used to cover the hoops and a 2nd sheet of unslitted plastic can be placed on best possible of the main layer when the temperature falls underneath freezing. A double layer of plastic sheeting–like a double glass sash on a cold frame–will entice air between layers for added insulation. Double thickness plastic will add 2 to 4 ranges (1.1-2.2 ranges C) or additional for higher protection against frost and freezing temperatures.
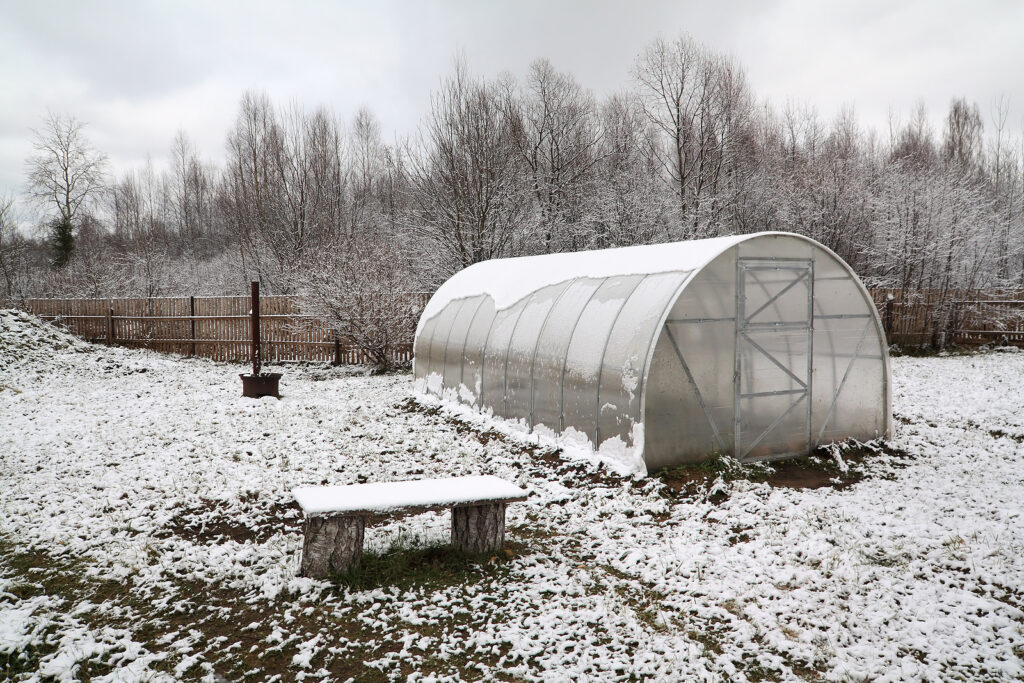
Making a Snow Resistant Tunnel for Wintry weather Use
To make a plastic tunnel that can resist snow, use metal or plastic tubing 1 ¼ inches in diameter or higher and sheeting that is 8-mil thick. Horizontal lengths of PVC tubing moreover can be added to the frame at the best and halfway down along the sides to make stronger the frame. The horizontal pieces can be fixed with duct tape or plastic zip ties. PVC tubing is continuously introduced in 10 or 20-foot (3-6m) lengths.
Similar to the arched plastic tunnel, rigid PVC pipe ½-inch (1.25cm) in diameter or higher can be decrease into 3 parts and a box-like frame can be assembled the usage of PVC elbows. The perimeters of the frame can be inserted into relatively upper PVC pipes driven into the ground 12-inches (30cm) or additional. Like a cold frame, a flat-topped plastic tunnel will have to have one facet taller than the other to allow for the runoff of rain and to stick snow from gathering and weighing down the absolute best of the frame.
Where to Place a Plastic Tunnel
Small plastic tunnels can be constructed over planting beds. They are able to be moveable or deconstructed when not sought after. Upper plastic tunnels might be additional permanent.
Like a cold frame, a plastic tunnel that may keep inside the garden all through the year will have to be situated transparent of prevailing winds and transparent of cold or damp spots inside the garden. Emerging vegetation inside a plastic tunnel isn’t any as opposed to emerging vegetation in a cold frame; the soil or emerging medium will have to be stored merely rainy, not wet, and beds will have to be weeded and tended merely as you perhaps can inside the open garden.
Plastic Tunnels in Summer time
When the weather turns warmth, the plastic tunnel can be lifted off of the emerging bed, disassembled, or the plastic sheeting can be removed and adjusted with chicken netting which creates a emerging bed safe from birds, rabbits, and deer right through the warm-part of the year.
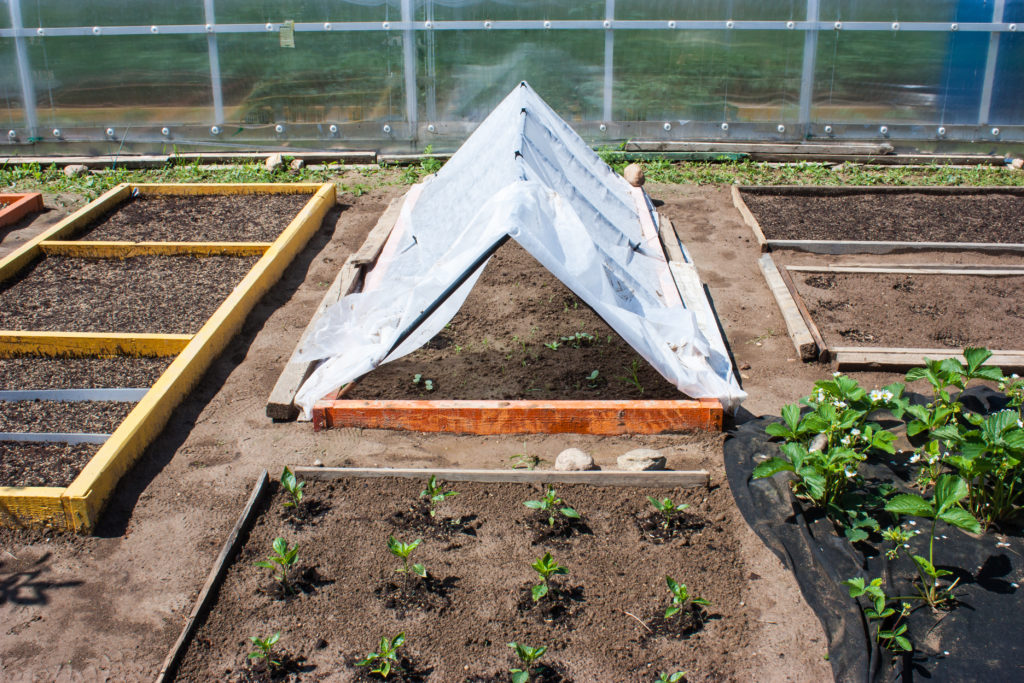
Plastic Tent Variety
A simple variety to a plastic tunnel is a plastic tent. You can make a peaked plastic tent by way of hanging plastic sheeting over a simple wooden or metal trellis frame like the kind you perhaps can use to expand pole beans up garden twine or wires. Place the sheeting over the frame and protected the sides with soil or boards.
Further tips to extend the season:
Floating Row Covers Plant Protection
Pre-Warmth the Soil Previous than Planting Vegetables


